

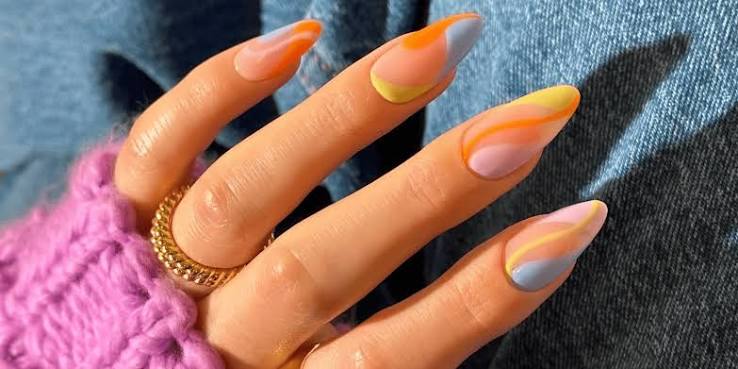
In the fast-evolving world of beauty tech, achieving a flawless, long-lasting manicure has traditionally required a trade-off. You could choose the affordability and ease of traditional nail polish, which often chips within days, or invest time and money into a salon gel manicure, which provides durability but risks nail damage during the harsh acetone-soaking removal process.
Enter gel nail wraps specifically semi-cured gel nail strips the innovative middle ground that has completely revolutionized modern nail care. These flexible, easy-to-apply strips deliver the high-gloss shine and chip-resistant strength of a professional salon visit right from the comfort of your couch.
This comprehensive guide breaks down everything you need to know about gel nail wraps, from how they work to master-level application techniques and safe removal secrets.
What Are Gel Nail Wraps?
Unlike classic vinyl nail stickers or plastic press-ons, high-quality gel nail wraps are made from actual liquid gel nail polish. During manufacturing, these strips are partially cured under a UV/LED lamp to about 60% capacity.
This leaves the material soft, flexible, and stretchy enough to conform easily to the natural curve of your nail bed. Once applied, the wrap undergoes a final cure under a home nail lamp, hardening it into a rigid, protective shell with a beautiful, glossy manicure finish.
Why Semi-Cured Gel Nail Strips Are Dominating Beauty Trends
The explosive popularity of at-home nail care solutions isn’t just a passing fad; it is a permanent shift driven by several major advantages over traditional salon services.
- Time and Cost Efficiency: A standard salon gel session can easily cost upwards of $40 to $80 and take an hour of your time. A single pack of gel nail wraps generally runs between $10 and $20, providing a complete manicure in under 20 minutes.
- Zero Dry Time: Because the strips are hardened instantly under a UV light, there is absolutely no risk of smudging your fresh nails while reaching for your keys or phone.
- Gentler on Natural Nails: Traditional salon gel and acrylic removals require aggressive scraping and prolonged exposure to 100% acetone, which strips away vital layers of your natural nails. Gel nail wraps bypass this entirely.
- Endless Aesthetic Options: From minimalist milky nails and delicate negative space accents to complex liquid cat-eye textures and metallic detailing, wraps allow you to sport intricate nail art without needing the steady hand of a master painter.
Step-by-Step Application for a Flawless, Long-Lasting Manicure
The secret to a 2-to-3-week gel nail wrap lifespan boils down to a single phase: nail prep. Any residual oils, dust, or moisture will compromise the adhesive backing and cause early lifting. Follow this precise methodology for professional results:
1.Prep the Nail Canvas:5 Minutes.
Start by washing your hands thoroughly with grease-cutting dish soap. Gently push back your cuticles using a wooden or rubber cuticle pusher. Lightly buff the surface of each nail with a fine-grit buffer to remove natural shine and create a slightly textured surface for bonding. Wipe each nail vigorously with an alcohol prep pad to eliminate any remaining dust or oils.
2.Select and Size the Strips:2 Minutes.
Compare the wrap sheet to your fingernails. Pro Tip: Always choose a strip that is slightly smaller than your actual nail bed rather than larger. If the wrap overlaps onto your skin or cuticle line, air and water will seep underneath, causing the edge to peel within 24 hours.
3.Apply and Press:5 Minutes.
Peel off the clear protective film. Place the curved edge of the wrap just above your cuticle line. Press firmly down the center of the nail, then smooth outward toward the side walls. Use your cuticle pusher to firmly seal the edges down, flattening any tiny air bubbles or creases.
4.Trim the Excess:3 Minutes.
Fold the excess overhanging strip over the free edge of your nail. Use a pair of nail clippers or small beauty scissors to snip away the bulk of the excess material, bringing it flush with your natural nail length.
5.Cure Under the Lamp:1-2 Minutes.
Place your hand under a UV/LED nail lamp and cure for 60 to 120 seconds (depending on the lamp’s wattage). You will feel the flexible strips transform into hard, solid extensions.
6.File to Finish:2 Minutes.
Once fully hardened, use a crisp nail file to smooth out the tips. Always file in a strict downward direction at a 90-degree angle. Never file side-to-side or upward, as this pulls the fresh gel away from the nail edge.
The Golden Rule of Nail Longevity
Apply your gel nail wraps right before going to bed. The adhesive backing takes a few hours to completely cure and fully bond to the nail plate. Avoiding water, hand lotions, and heavy hand-washing for the first 8 hours will dramatically extend the lifespan of your manicure.
Common Mistakes to Avoid
Even though semi-cured gel nail strips are incredibly user-friendly, beginners often encounter a few common pitfalls that can shorten the life of their gorgeous new set.
| The Mistake | The Consequence | The Easy Fix |
| Overlapping the cuticle | Rapid lifting and hair snagging | Leave a tiny, hairline fraction of space between the wrap and your skin. |
| Applying in direct sunlight | The wraps harden inside the package | Always apply your sets indoors, away from windows. Ambient sunlight contains natural UV rays that will prematurely cure your unused strips. |
| Using a standard top coat | Cracking or melting the gel | If you want extra shine, only use a dedicated UV gel top coat that requires a lamp to cure. Traditional air-dry top coats are chemically incompatible with gel wraps. |
Safe, Damage-Free Removal
When it is time for a style change, never, under any circumstances, rip or peel the hardened gel nail wraps off your fingers dry. Doing so tears away the delicate top layers of keratin from your natural nails, leaving them weak, thin, and brittle.
Instead, utilize a nourishing, oil-based approach:
- Loosen the Edges: Coat your fingers and the base of the nails in a generous amount of cuticle oil, coconut oil, or a specialized gel strip remover.
- Gently Lift: Dip a wooden orange stick into your oil or remover. Locate the edge of the wrap near the cuticle and slowly slide the stick underneath to break the adhesive bond.
- Work Gradually: Slowly slide the stick horizontally beneath the wrap, working from the base toward the tip. Apply extra drops of oil under the flap as you lift to continuously dissolve the glue.
- Hydrate: Once the wraps glide off, wash away any leftover residue and finish with a rich hand cream to keep your hands looking flawless.
By prioritizing healthy nail prep, choosing the correct sizes, and practicing patient removal, gel nail wraps give you an effortless, gorgeous, salon-standard manicure without sacrificing the health of your natural nails.
